
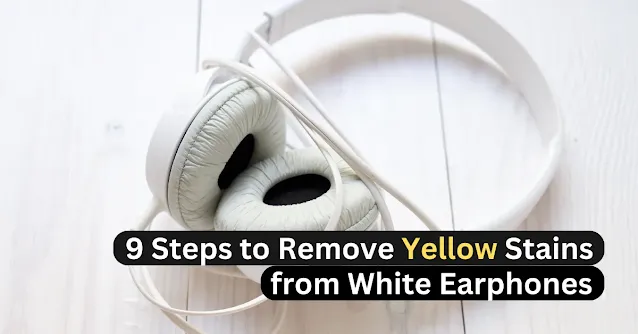
9 Steps to Remove Yellow Stains from White Earphones
White earphones are popular for their sleek and clean appearance. Over time, they might get ugly yellow marks that make them look less nice. These stains are often caused by factors such as sweat, dirt, and exposure to environmental elements.
But fear not, as we're here to guide you through the process of removing the stains and restoring your white earphones to their original brilliance.
What causes white earphones to turn yellow?
There are a number of factors that can cause white earphones to turn yellow.One of the most common causes is sweat. Sweat contains salts and other minerals that can react with the materials used to make earphones, causing them to yellow.
Dirt and dust can also cause yellowing, as can exposure to the sun. Over time, these factors can combine to make your white earphones look dingy and discolored.
How to Remove Yellow Stains from White Earphones?
Removing yellow stains from your headphones isn't rocket science at all. But you should follow step-by-step instructions for better results.Before we dive into the cleaning process, gather the following materials:
- White vinegar
- Baking soda
- Soft toothbrush
- Cotton swabs
- Mild dish soap
- Microfiber cloth
- Warm water
- Toothpicks
- Rubbing alcohol
Step 1: Remove Ear Tips and Cables

Step 2: Brush away loose debris.

Step 3: Create a Cleaning Solution
Mix a solution of warm water and mild dish soap. Dip a microfiber cloth into the soapy water and wring it out so it's damp but not dripping.Step 4: Wipe the Earphones
Gently wipe the earphones with a damp cloth to remove surface stains and grime. Avoid letting water enter the earphone's speaker grilles or ports, as this could damage the internal components.Step 5: Address Yellow Stains with Vinegar
For stubborn yellow stains, make a paste by mixing baking soda and white vinegar. Use a cotton swab or a soft toothbrush to apply the paste to the stained areas. Be gentle, and avoid getting the paste inside the earphone's openings.Note: You can absolutely use any other guaranteed product instead of the baking soda and white vinegar mixer.
Step 6: Let the paste sit.
Allow the vinegar and baking soda paste to sit on the stains for about 10–15 minutes. This will help break down and lift the yellow discoloration.Step 7: Scrub Gently
After the paste has had time to work, use the toothbrush or cotton swab to gently scrub the stained areas. Use circular motions and be patient; it may take some time to see results.Step 8: Rinse and dry
Rinse the earphones with a clean, damp cloth to remove any residue. Make sure they are completely dry before reattaching the ear tips and cables. You can use a dry cotton swab or toothpick to carefully reach small crevices and corners.Step 9: Optional alcohol wipe
If the stains persist, you can try wiping the earphones with rubbing alcohol using a soft cloth or cotton swab. This can be effective in removing stubborn stains, but use it sparingly and avoid getting alcohol inside the earphone's openings.Also read: Should I Get Black or Silver Headphones?
Tips to prevent yellow stains on white earphones
There are a number of things you can do to prevent your white earphones from turning yellow in the first place.One of the most important things is to clean them regularly. After each use, wipe down your earphones with a damp cloth to remove any sweat, dirt, or dust.
You should also avoid exposing your earphones to direct sunlight, as this can cause them to yellow. If you do need to use your earphones outdoors, try to keep them in the shade as much as possible.
FAQs
Q1) Can I use bleach to remove yellow stains from my earphones?Answer: It's not recommended to use bleach, as it can damage the plastic or rubber material and potentially harm the earphones' functionality. Stick to the methods mentioned in the article.
Q2) Are there any specific cleaning products I should avoid?
Answer: Yes, avoid abrasive or harsh cleaning products like abrasive scrubbers and strong chemicals, as they can scratch or damage the earphones.
Q3) How often should I clean my earphones to prevent yellow stains?
Answer: Regular maintenance is essential. Cleaning your earphones every few weeks or whenever you notice stains can help prevent them from becoming deeply ingrained.
Q4) Will cleaning my earphones with vinegar and baking soda affect their sound quality?
Answer: When done correctly, cleaning with vinegar and baking soda should not affect sound quality. Just be careful not to get liquid inside the speaker grilles or ports.
Q5) What if the yellow stains don't come off after cleaning?
Answer: If stains persist, you can try rubbing alcohol sparingly, but avoid getting it inside the earphone openings.
Conclusion
With a little patience and the right materials, you can easily restore your white earphones to their former glory. Regular cleaning and maintenance will help prevent yellow stains from reappearing, keeping your earphones looking fresh and clean for years to come.
Tusher Shaha
Hi! I am Tusher Shaha, the author and creator of The Tech Ideal. As a content creator, I enjoy sharing knowledge. My love is reviewing the most recent smart devices (like; smartphones, earbuds, watches and so on) and keeping up with technology. Cheers!

![Starlink Residential Lite Plan Review: Price, Speeds & Installation [2025]](https://blogger.googleusercontent.com/img/b/R29vZ2xl/AVvXsEiZ5F4iyM8wYcBghcRHqf-sWEjiv4_VXvD7G1ycqm7C-7Le9cMBdTGDiZWGiGf8U1UfZ2O_svHa3uRJJoaOqchBzj4m_EqWn3LcMiY6iwYQiw3lCTnTFF86y2Uhy08iQnAzWVXDbucJ5gxgs6DaF8LwR0blSYaMD3aIeqf6OfxTtVQ-IceWJAVmKT0szG2A/w640-h426/Starlink%20Residential%20Lite%20Plan%20Review%20Price%20Speeds%20&%20Installation%20%5B2025%5D.png)
![iPhone 16e Trade-In Deals at T-Mobile: Best Offers & Upgrade Guide [2025]](https://blogger.googleusercontent.com/img/b/R29vZ2xl/AVvXsEgSiUZbAoOFf9UujQbD8E71wy5ILM6EZCZoKC2P0_fd1BEA_Wq70nbBbvf6in35Zf3FMlVdMR1gIDEgy7H16VCJ3WpptxCmFrSl2frJyf60RddD9LTBbx9mQu-I4I4ABVZk178qbiz0UNix5T3bMpcxf2L0OBqVxlGi7hRpU09g5ghDNAL5arr1-M0oHq6b/w640-h640/iPhone%2016e%20Trade%E2%80%91In%20Deals%20at%20T%E2%80%91Mobile%20Best%20Offers%20&%20Upgrade%20Guide%20%5B2025%5D.png)

![Google Fiber 8 Gig Plan: Pricing, Router Setup & Real-World Speeds [2025]](https://blogger.googleusercontent.com/img/b/R29vZ2xl/AVvXsEi6_qJNt_RvZC1JwQNNF6bBzU0c2FGCYzE6Mm0ZYzdV8-I4XVsyYmAOV20pYLgNBMHh9oxUL-N_Mtf3FknK_CF3hKvTXjF5lDtKlsYR6uVF0tjAnrF0nntZtKeq5i2Ew8HATrCphVi2qo2vtjprcQYNdSHfOGFquauxU_e1sbG0CW1070Xsq8m_rW7OGLSm/s16000/Google%20Fiber%208%20Gig%20Plan%20Pricing,%20Router%20Setup%20&%20Real%E2%80%91World%20Speeds%20%5B2025%5D.png)